
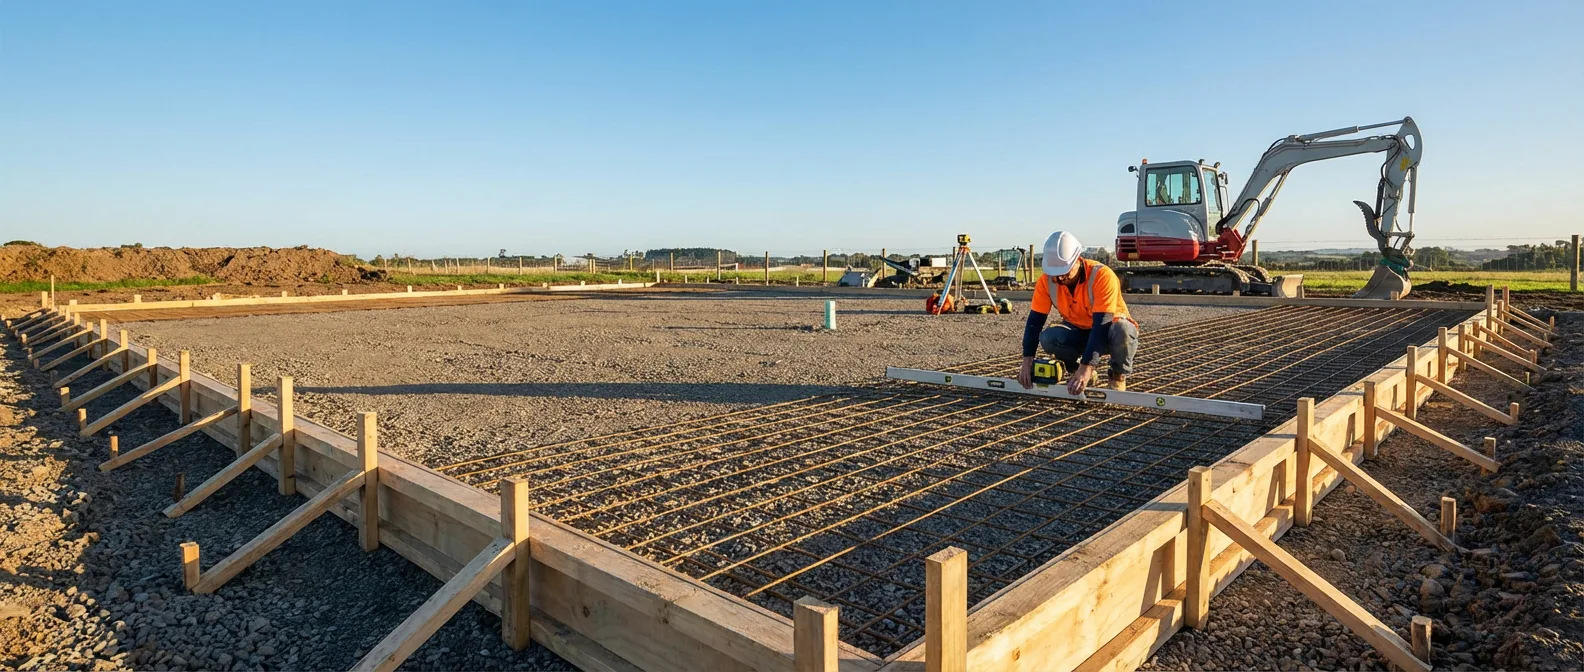
UPDATE EXISTING — Site prep tie-in forms the backbone of durable concrete foundations, ensuring the vital connection between groundwork and slab construction is flawless. Mastering this interface is key for builders and DIYers in Melbourne’s Northern suburbs aiming to deliver resilient, code-compliant house slabs that stand the test of time. This comprehensive guide explores every essential aspect of site preparation, from soil compaction to slab thickness standards, focusing on updated techniques and regional best practices for success.
Understanding the Critical Role of Site Preparation in Slab Construction
Overview of Site Prep Tie-In with Slab Foundations
The site prep tie-in phase represents the critical juncture where groundwork prepares to seamlessly integrate with slab construction. It involves ensuring all preparatory measures—soil compaction, base installation, moisture barriers—are executed to specifications that support the slab’s structural requirements. This interface directly influences foundation performance, bonding strength, and longevity, making it indispensable for flawless slab installations.
Why Proper Site Prep Affects Slab Longevity and Structural Integrity
Proper site preparation mitigates risks such as differential settlement, cracking, and moisture ingress that compromise slab integrity over time. Without thorough compaction and correct base layering, soil movement underneath the slab can induce uneven stresses, undermining load distribution. Similarly, inadequate moisture barriers can lead to vapor transmission that weakens concrete and affects indoor air quality. As Civil Engineers Australia highlights, comprehensive site prep supports the slab’s ability to resist environmental and load challenges, extending service life significantly.
Key Stakeholders: Roles of Contractors and Site Preparers in the Tie-In Phase
Successful site prep tie-in requires coordinated expertise from contractors, site preparers, and civil engineers. Contractors oversee adherence to regulatory standards such as Australian Building Codes Board (ABCB) guidelines, while site preparers focus on precise grading, compaction, and base installation. Their combined role ensures the groundwork environment meets strict thresholds for bearing capacity and moisture control before slab pouring begins. Effective communication during this phase prevents costly errors downstream.
With the foundational understanding set, the next focus is soil compaction and site grading—the first tangible steps toward a stable slab anchor.
Soil Compaction and Site Grading: Building the Foundation for a Stable Slab
Methods and Tools for Effective Soil Compaction (Plate Compactors, Roller Types)
Achieving optimal soil density is crucial for foundation stability. The industry standard commonly recommends compacting subgrade soil to at least 95% of the Modified Proctor density, ensuring minimal future settlement. Tools vary by soil type and site scale:
- Plate Compactors: Ideal for granular soils and smaller areas, providing high-frequency vibrations to densify loose particles effectively.
- Roller Compactors: Suitable for larger sites and cohesive soils like clay, offering static or vibratory compaction modes.
Manufacturers specify equipment operating procedures to obtain uniform compaction, preventing over or under densification that could impair slab performance. For instance, using a plate compactor with multiple passes and overlapping coverage ensures consistent ground firmness.
Importance of Site Grading and Leveling for Slab Uniformity
Site grading precedes compaction and involves shaping the ground to a precise level and slope for drainage. This process prevents water pooling under slabs, a common cause of soil swelling and weakening. Laser levels and optical transits confirm accurate elevation control, typically within ±10 mm over the entire slab footprint. Adequate grading channels water away from foundations, reducing erosion and preserving soil bearing capacity as underscored by Standards Australia technical notes.
Identifying and Mitigating Differential Settlement Risks
Differential settlement arises when varying soil compositions or compaction levels allow uneven slab movement, leading to cracks. Understanding local soil profiles—whether clay, sand, or loam—guides tailored compaction and base selection strategies. For instance, clay soils require deeper stabilisation layers or moisture control to reduce shrink-swell behaviour. Incorporating geotechnical assessments before and after compaction is critical to identify zones at risk and apply mitigation techniques such as soil conditioning or geofabrics.
Proper soil compaction and grading lay the groundwork for selecting and installing a stable concrete base. For homeowners considering not only slab preparation but also aesthetic enhancement, exploring the best coloured concrete driveway options in Melbourne offers valuable insights into finished surfaces and design possibilities.
Selecting and Installing the Concrete Base: Materials and Techniques
Choosing the Right Base Material: Gravel vs. Crusher Dust vs. Other Alternatives
The concrete base acts as the load-distributing platform beneath the slab. Material choice affects drainage, compaction ease, and slab support.
- Gravel: Preferred for excellent drainage and compaction; typically 10–20 mm aggregate granules that lock together tightly.
- Crusher Dust: A finely graded alternative offering a smoother finish but less permeability—best used where drainage is managed separately.
- Other Alternatives: Recycled aggregates and engineered base mixes are emerging for sustainability, though regional adaptation is ongoing.
Selecting materials should consider site drainage, local availability, and conformity with Australian standards like AS 3798 for base layer construction. For inspiration on how base material choices influence the final surface aesthetics, review the coloured concrete driveway trends Melbourne 2026.
Base Thickness Standards and Layering Recommendations
Base thickness varies based on soil type and slab load, with typical residential recommendations ranging from 75 mm to 150 mm compacted depth.
| Soil Type | Minimum Base Thickness (mm) | Notes |
|---|---|---|
| Granular (Sand, Gravel) | 75–100 | Good drainage aids minimal thickness |
| Clay or Expansive Soil | 100–150 | Thicker base required for moisture buffering |
Base layers are ideally installed in 100 mm lifts, each compacted before adding the next. This prevents air pockets and achieves uniform density critical for slab support.
Practical Steps for Base Installation and Compaction
- Clear and level site per grading specifications.
- Spread base material evenly, avoiding overfilling or underfilling.
- Compact each 100 mm lift thoroughly with appropriate equipment.
- Confirm uniform thickness and no loose spots using site inspection tools such as a nuclear density gauge.
- Prepare for moisture barrier placement immediately after final base compaction.
When base installation meets these criteria, moisture barriers are ready for deployment beneath the slab.
Moisture Barriers and Their Role in Site Prep Tie-In
Types of Moisture Barriers with Focus on Polyethylene Sheeting
Moisture barriers are critical for preventing upward vapor transmission that weakens slabs and indoor environments. Polyethylene sheeting—typically 200–300 microns thick—is the industry standard due to its impermeability and durability. Alternatives like bituminous membranes exist but are less common in residential Melbourne slab prep. Selecting high-density polyethylene (HDPE) ensures resistance to punctures and chemical reactions with concrete.
Correct Placement and Overlap Techniques for Effective Vapor Protection
Proper installation requires:
- Continuous coverage over the entire compacted base without gaps.
- Overlaps of at least 150–200 mm at seams, sealed with durable tape or adhesive.
- Wrapping edges up against foundation forms to create a full barrier envelope.
- Placing protective cushioning (such as geotextile layers) to prevent damage from reinforcing mesh and concrete pouring.
Incorrect barrier placement leads to moisture pathways, promoting slab deterioration. Australian Construction Code Section 126.96.36.199 outlines vapor barrier installation guidelines to avoid such risks.
Impact of Moisture Barriers on Slab Durability and Indoor Air Quality
Aside from structural benefits, moisture barriers reduce radon gas infiltration and mould risks under floors, contributing to healthier indoor air quality (IAQ). Studies by the CSIRO confirm the link between effective vapor barriers and long-term slab performance in Australian climates.
With moisture barriers securely in place, slab thickness decisions ensure the foundation meets load and design demands.
Determining and Ensuring Correct Slab Thickness for Residential Construction
Standard House Slab Thickness Guidelines and Australian Building Codes
The Australian Standard AS 2870:2011 (amended 2021) dictates minimum slab thickness based on soil classification and building loads. For typical residential concrete house slabs:
- Minimum thickness of 100 mm for standard house slabs on class H1–H5 soils.
- Increased thickness up to 150 mm or more in areas with expansive clays or heavy load requirements.
- Additional thickness recommended under load-bearing walls or garage slabs (up to 175mm).
How Thick Should a Concrete Floor or Slab Be? Factors Influencing Thickness
Several factors impact slab thickness selection:
- Soil bearing capacity: Weaker soil necessitates thicker slabs or alternate base reinforcement.
- Load type and distribution: Heavier equipment or partitions require thicker slabs.
- Reinforcement method: Mesh or rebar can allow thinner slabs by reducing tensile stresses.
- Climate and moisture conditions: Slabs in wet or reactive soil zones typically have greater depth.
Consulting with qualified engineers integrates these factors into slab design, aligning with NCC Volume 2 requirements.
Accurately determining slab thickness also includes proper volume estimation — see our guide on calculating bags of concrete per cubic metre for precise material planning.
Reinforcement Integration with Thickness Decisions (Rebar, Mesh)
Reinforcement supports slab thickness by controlling crack widths and tensile loads. Commonly, welded wire mesh or steel rebar is embedded near mid-depth of the slab. Minimum cover to reinforcement is 30 mm to protect against corrosion. Effective tie-in between reinforcement placement and slab thickness ensures balanced structural performance, as outlined in Concrete Institute of Australia guidelines.
Thickness must harmonize with site prep conditions — the following section explores tie-in techniques essential to achieving this balance in practice.
Tie-In Techniques: Integrating Site Prep With Slab Pouring for Optimal Performance
Step-by-Step Processes During the Site Prep Tie-In Stage (Excluding Concrete Pouring Details)
- Final Site Inspection: Confirm compaction tests exceed 95% Modified Proctor; verify base thickness and uniformity.
- Moisture Barrier Setup: Place and seal polyethylene sheeting, ensuring overlap and damage-free coverage.
- Reinforcement Placement: Install rebar or mesh with spacers to maintain specified cover from base.
- Edge Formwork and Embedments: Set and secure formwork lines tied into site grading to guarantee slab perimeter is level and aligns with design elevation.
- Pre-Pour Quality Check: Conduct moisture barrier continuity tests and reinforcement positioning verification.
- Coordination with Pouring Crew: Communicate any last-minute site prep issues or variations in thickness required for load zones.
Each step is vital to ensuring the slab’s base is uniform and compliant with building codes before concrete application.
While this article focuses on site preparation tie-in, those needing guidance on the pouring phase can refer to our step-by-step guide to pouring concrete slab for sheds.
Common Challenges & Pitfalls to Avoid During Tie-In
- Incomplete compaction zones: Leading to localized slab failure.
- Moisture barrier tears or gaps: Permitting moisture ingress and slab weakening.
- Incorrect reinforcement cover or misplacement: Cause cracking and corrosion.
- Uneven formwork setup: Resulting in slab thickness irregularities.
- Poor communication between site prep and pouring teams: Delays or rework risk.
Awareness and proactive measures substantially reduce these risks.
Updated Regional Standards and Best Practice Recommendations
Recent updates to NCC (2024) and AS 2870 revisions emphasize enhanced testing and verification during the tie-in phase:
- Mandatory documentation of site compaction results.
- Stricter moisture barrier installation protocols, including adhesive taping requirements.
- Increased focus on edge beam and slab thickness uniformity with laser-guided formwork.
- Compulsory contractor certification of tie-in quality before concrete pour approval.
Compliance ensures that slab foundations in Melbourne’s Northern suburbs are equipped to withstand variable soil and environmental conditions.
Post-Preparation Considerations: Curing Basics and Monitoring for Quality Assurance
Fundamentals of Concrete Curing Related to Site Prep Conditions
Proper curing transforms a freshly poured slab into a durable foundation. Curing maintains moisture content and temperature to facilitate cement hydration, reducing shrinkage cracks. Site prep conditions—such as moisture barrier effectiveness—directly impact curing efficiency by retaining water underneath the slab. Common curing methods include water spraying, wet coverings, or chemical curing compounds.
Monitoring Settlement and Early Warning Signs of Site Prep Failures
Early detection of settlement or slab movement is crucial. Indicators include:
- Visible cracking patterns or misalignment.
- Uneven floor surfaces after curing.
- Moisture pooling or damp patches under floor finishes.
Contractors often employ settlement gauges and regular inspections during the first 28 days post-cure. Immediate action on anomalies prevents costly remediation.
Contractor Expertise and Tools for Ensuring Tie-In Quality
Experts rely on tools such as nuclear density gauges and laser levels during post-prep inspection to certify site readiness. Contractor qualifications in site prep verification guarantee compliance with Australian standards. Integrating these processes offers clients peace of mind for slab durability and performance.
Budget-conscious readers can also explore current concrete slab costs in Melbourne to align curing timelines with project expenses.
Advanced Considerations and Innovations in Site Preparation for Slab Foundations
Emerging Materials and Techniques Impacting Site Prep and Slab Tie-In
New developments in site prep include:
- Sustainable Base Materials: Crushed recycled concrete and geopolymer aggregates reduce environmental footprint.
- Smart Compaction Devices: GPS-integrated rollers and real-time compaction monitoring improve uniformity.
- Enhanced Moisture Barriers: Multi-layer vapor retarders with improved puncture resistance.
These technologies are gradually gaining traction in Melbourne, promising improved foundation durability and eco-efficiency.
Case Studies Demonstrating Successful Site Prep Tie-Ins
Recent residential developments in Melbourne’s Northern suburbs have showcased best practice application:
- Project A: Utilised advanced soil stabilizers combined with high-density polyethylene sheeting, resulting in zero post-pour cracks after 24 months.
- Project B: Integrated GPS-monitored compaction achieving 98% Proctor density consistently, allowing for reduced slab thickness without integrity loss.
These examples underscore the value of precise tie-in execution informed by innovation.
Future Trends and Regulatory Updates in Slab Construction Practices
Looking ahead, regulatory bodies are expected to mandate:
- Greater documentation and digital verification of site prep processes.
- Enhanced requirements for moisture barrier materials addressing climate change-induced flooding risks.
- Increased adoption of sustainability measures including green base materials and carbon footprint tracking.
Staying abreast of these trends equips contractors and homeowners to future-proof slab foundations.
Homeowners considering not only slab preparation but also aesthetic enhancement, exploring the best coloured concrete driveway options in Melbourne offers valuable insights into finishing touches achievable over quality slabs.
If interested in base material impacts on concrete surfaces, review the coloured concrete driveway trends Melbourne 2026 for design inspiration linked to site prep choices.
Conclusion: In Melbourne’s Northern suburb context, mastering the critical tie-in between site preparation and slab construction is paramount to building long-lasting concrete foundations. Ensuring optimal soil compaction, precise grading, correct concrete base installation, moisture barrier integrity, and slab thickness compliance with Australian standards safeguards structural integrity and occupant safety. Integrating updated regional codes and leveraging modern innovations further enhances slab performance and durability. For contractors and DIY enthusiasts alike, this detailed understanding promotes confident, code-compliant slab builds equipped to stand the test of time.
Ready to lay the groundwork for your next project? Engage local experts specializing in site prep tie-in to ensure your concrete slab meets every essential criterion for excellence.
Frequently Asked Questions
What is the difference between gravel and crusher dust for a concrete base?
Gravel provides superior drainage and compaction due to its coarser, interlocking particles, making it ideal for stable slab support. Crusher dust is finer and offers smoother finishes but less permeability, requiring separate drainage solutions to prevent moisture buildup under slabs.
How does soil compaction impact the risk of differential settlement?
Proper soil compaction reduces air voids and increases soil density, minimizing uneven soil movement under slabs. Without adequate compaction, different soil areas settle variably, causing slab cracks, misalignment, and compromised foundation performance.
Why is polyethylene sheeting commonly used as a moisture barrier?
Polyethylene sheeting is favored for its high impermeability, durability, and resistance to punctures and chemical reactions with concrete. Its thickness (200–300 microns) effectively prevents vapor transmission that can weaken slabs and degrade indoor air quality.
How thick should a slab be in areas with expansive clay soils compared to standard soils?
Slabs in expansive clay soils typically require thicknesses of 150 mm or more to buffer soil movement, while standard residential slabs on stable soils generally have minimum thicknesses around 100 mm, adjusted for load and reinforcement needs.
Which tools are most effective for achieving uniform site grading before slab construction?
Laser levels and optical transits are the most effective for precise site grading, ensuring level surfaces and correct slopes within tight elevation tolerances. This accuracy prevents water pooling and supports slab uniformity and durability.
Can reinforcement methods influence the required concrete slab thickness?
Yes, reinforcement such as welded wire mesh or steel rebar can reduce slab thickness by controlling tensile stresses and crack widths, allowing thinner slabs without compromising structural integrity when properly covered and placed.
What are the key differences between plate compactors and roller compactors in soil preparation?
Plate compactors use high-frequency vibrations for compacting granular soils in smaller areas, while roller compactors provide static or vibratory compression suited to larger sites and cohesive soils like clay, offering deeper and more uniform compaction.
How does effective site grading contribute to slab longevity?
Effective site grading ensures proper drainage by directing water away from foundations, preventing soil erosion and moisture accumulation beneath slabs. This controls soil stability and reduces risks of swelling and settlement, extending slab service life.