
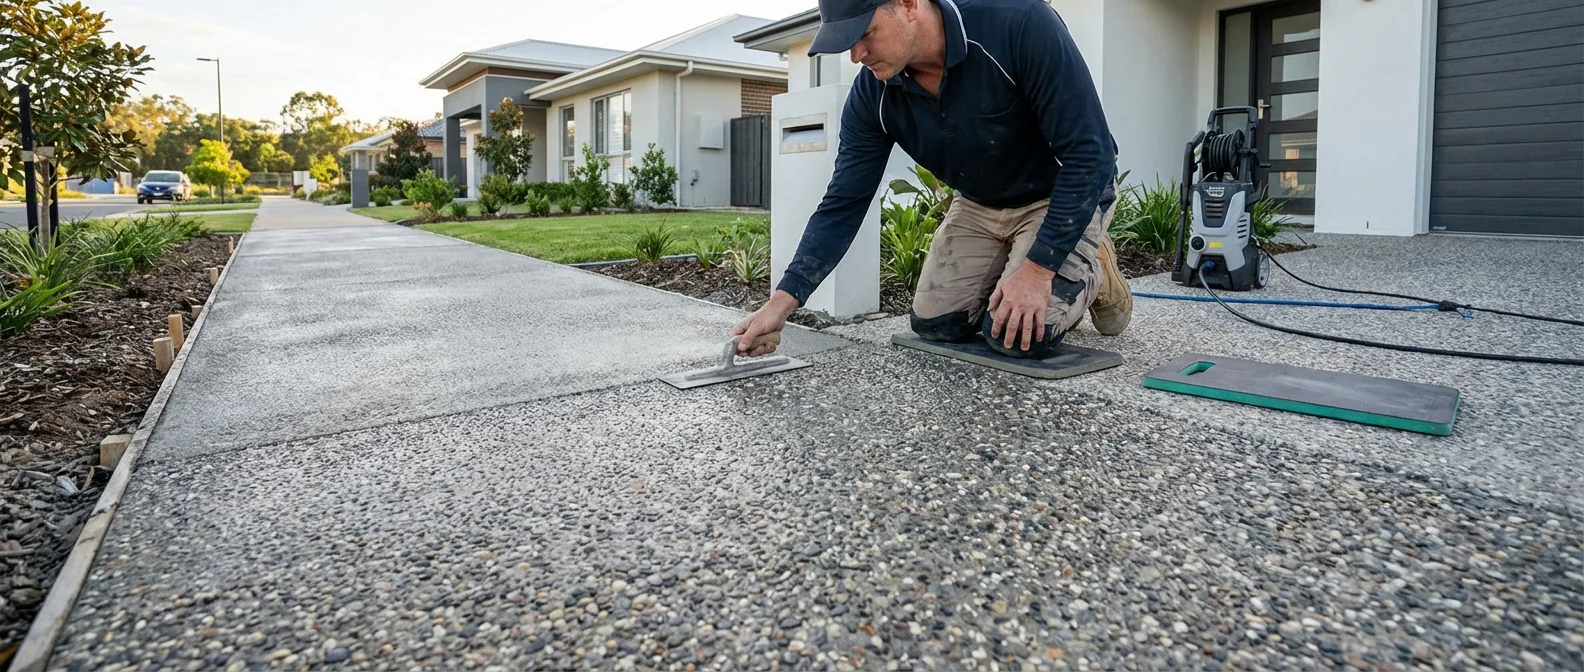
How to lay exposed aggregate concrete with professional precision is a craft that defines durable, visually appealing outdoor surfaces. Whether you’re installing an exposed aggregate pathway, floor, or patio in Melbourne’s northern suburbs, mastering the exact workflow ensures a flawless finish every time. This article delivers a comprehensive, step-by-step blueprint built for serious builders and experienced DIYers seeking expert guidance on mixing, pouring, exposing aggregates, curing, and sealing with pro-level control.
Understanding Exposed Aggregate Concrete: Materials and Basics
What is Exposed Aggregate Concrete?
Exposed aggregate concrete is a decorative concrete finish where the top layer of cement paste is removed to reveal the embedded aggregate beneath. This technique produces a texture-rich surface combining durability with aesthetic variety, popular for outdoor environments such as exposed aggregate pathways, patios, and floors. The exposed surface not only enhances slip resistance but also provides weather resilience suited to Melbourne’s variable climate.
Types of Aggregates Used (Pebbles, Gravel, Crushed Stone)
Choosing the right aggregate is critical. Common types include:
- Pebbles: Smooth, rounded stones often from riverbeds, lending a polished, natural look.
- Gravel: Irregular, coarse pieces that create a rustic, rugged texture.
- Crushed Stone: Angular fragments offering a pronounced texture, ideal for high-traction surfaces.
Aggregate size and shape influence both the visual appeal and surface traction, so select based on the desired aesthetic and environmental conditions.
Characteristics and Benefits of Exposed Concrete Floor and Pathways
This finish delivers:
- Enhanced durability: The exposed aggregate withstands wear better than smooth finishes.
- Slip resistance: Textured aggregates improve safety, essential for pathways.
- Low maintenance: The robust surface resists staining and weather impacts.
- Versatility: Suitable for driveways, patios, garden features, and commercial areas.
Overview of Tools and Equipment (Concrete Mixer, Finishing Tools, Safety Gear)
Essential tools include:
- Concrete mixer: Ensures homogeneous aggregate distribution; improper mixing leads to uneven exposure and finish.
- Surface retarders: Chemicals applied to delay cement set on the surface for exposure.
- Trowels and floats: For initial smoothing and finishing before exposure.
- Brushing tools: Nylon or natural fiber brushes to gently reveal aggregates post-retarder application.
- Pressure washers: For precise removal of surface cement during exposure phase.
- Safety gear: Includes gloves, goggles, dust masks, and protective clothing, critical for safe handling of chemicals and materials.
Understanding these elements lays the groundwork for a professional workflow. Next, we’ll prepare your site and concrete mix to achieve optimal results.
Preparing the Site and Concrete Mix for Exposed Aggregate
Site Assessment and Base Preparation (Drainage, Subgrade, Formwork)
Site prep starts by evaluating soil stability and drainage – poor subgrade conditions lead to cracking. Follow these steps:
- Excavation: Remove unsuitable soils to required depth.
- Base layer: Lay compacted gravel/sub-base—aim for a minimum 100mm compacted thickness.
- Drainage: Integrate subsurface drains to prevent water pooling.
- Formwork installation: Set up firm, level formwork to contain concrete; use level tools and braces for stability.
Accurate formwork and base integrity ensure slab uniformity and longevity.
Selecting and Preparing the Concrete Mix: Aggregate Ratios and Additives
A well-designed mix balances workability and aggregate exposure. Pro tips include:
- Use a standard concrete mix with a w/c (water-cement) ratio around 0.45–0.50; lower ratios reduce shrinkage.
- Incorporate 10–20% coarse aggregate by volume, matching your exposed stones for consistency.
- Integrate additives such as plasticisers for improved flow and air-entraining agents to enhance freeze-thaw resistance, crucial for Melbourne’s seasonal changes.
Mix to achieve a target slump between 75–100mm, ensuring it’s not too stiff or watery for exposing aggregates later.
Setting Up Safety Measures and Compliance Standards
Compliance with site safety is mandatory:
- Ensure all workers use appropriate personal protective equipment (PPE), including respirators when handling retarders and sealers.
- Follow Safe Work Australia’s guidelines for concrete handling.
- Maintain clear site access and emergency protocols.
Pricing Factors and Budgeting for Exposed Aggregate Concrete Projects
The exposed aggregate concrete price depends on:
| Factor | Impact on Cost |
|---|---|
| Aggregate type and source | Higher-quality or specialty pebbles raise costs |
| Site preparation complexity | Uneven terrain or drainage requirements add labour |
| Chemical retarders and sealers | Premium products increase materials budget |
| Labour skill level | Experienced contractors demand higher rates but yield better finish |
| Project scale | Volume discounts may apply for large pours |
Planning your budget early avoids compromises on material quality or workmanship that would affect final appearance and durability.
For a broader selection of coloured concrete driveway options to complement your exposed aggregate finish, see our detailed guide on coloured concrete driveway options.
Step-by-Step Professional Workflow for Laying Exposed Aggregate Concrete
Pouring and Leveling the Concrete Slab
- Pour concrete continuously within the formwork to prevent cold joints.
- Level using a screed board; ensure a consistent surface without overworking which can push aggregates down.
- Use a bull float immediately after screeding to seal bleed water, preparing for retarders.
Applying Surface Retarders: Methods and Timing
Surface retarders chemically delay cement hydration on the slab surface, enabling aggregate exposure without compromising slab integrity. Key points:
- Apply retarders evenly with spray equipment within 1–2 hours post-pour, depending on ambient conditions.
- Timing is crucial—too early leads to aggregate loss; too late reduces exposure depth.
- Test small areas to fine-tune timing based on weather, referencing ACI guidelines Section C940.
Timing the Aggregate Exposure: When and How to Wash and Brush
Exposure timing typically occurs 24–48 hours post-application of retarders:
- Begin gently washing the surface with low-pressure water to remove surface paste.
- Use soft nylon brushes for manual scrubbing to enhance aggregate reveal without damaging the bond.
- Avoid harsh power washing, which can undermine slab adhesion.
Environmental factors such as temperature and humidity affect timing. In hot Melbourne summers, commence washing earlier; cooler conditions require patience to avoid premature aggregate loosening.
Troweling and Brushing Techniques for Optimal Finish
- Initial troweling after pouring levels the surface but avoid over-troweling that seals surface, hindering retarder action.
- Post-exposure brushing must focus on even aggregate reveal; employ consistent strokes aligned with surface contours.
- Finish with a broom or brush to enhance slip resistance on walkways and patios.
Common Pitfalls During Installation and How to Avoid Them
- Uneven Aggregate Exposure: Caused by inconsistent retarder application or washing—use test patches and maintain uniform spray techniques.
- Surface Scaling: Overwatering or premature washing—monitor surface dryness closely.
- Aggregate Displacement: Excessive brushing or power washing—limit mechanical abrasion.
- Cold Joints: Ensure continuous pouring within formwork for slab integrity.
Executing these steps ensures a consistent, attractive, and functional exposed aggregate finish. Next, the curing and sealing phase will safeguard your investment.
Curing, Sealing, and Finishing Exposed Aggregate Surfaces
Proper Curing Process and Recommended Curing Compounds
Effective curing promotes hydration, strength development, and surface durability. Recommendations include:
- Maintain surface moisture by covering with wet burlap or plastic sheets immediately after exposure phase.
- Apply high-quality curing compounds such as membrane-forming acrylics within 12–24 hours of washing.
- Choose compounds compliant with ACI curing standards to ensure optimal moisture retention.
- Cure for a minimum period of 7 days, extending to 14 days in cooler weather.
Choosing and Applying Sealers to Enhance Durability and Appearance
Sealants protect against stains, UV degradation, and water ingress. Two main types are:
- Penetrating sealers: Absorbed into aggregate pores, preserving natural texture.
- Film-forming sealers: Create a protective layer enhancing sheen but may alter texture.
Apply sealers using low-pressure sprayers or rollers, avoiding puddles to ensure uniform coverage. Two coats are standard for Melbourne exposure conditions.
Maintenance Tips for Exposed Aggregate Pathways and Floors
- Regularly clean surfaces with mild detergents to avoid buildup of dirt or algae.
- Inspect sealers annually; reapply as needed to maintain surface protection.
- Avoid acid-based cleaners that can degrade sealers and exposed aggregates.
Troubleshooting Surface Defects Post-Installation
Common issues and fixes:
- Dusting or scaling: Indicates inadequate curing; consider resealing and improving drainage.
- Uneven sheen: Reapply sealer or buff surface after full cure.
- Cracking: Typically due to base failure—require assessment and potential slab repair.
Proper curing and sealing maximize lifespan and aesthetic appeal. Let’s explore specialized applications next.
Specialized Applications and Use-Cases of Exposed Aggregate Concrete
Installing Exposed Aggregate on Outdoor Pathways and Driveways
Exposed aggregate is ideal for high-traffic outdoor surfaces due to its slip-resistance and strength. When applied to driveways, choose higher structural grade concrete and wear-resistant aggregates. Refer to the best coloured concrete driveway options for Melbourne for complementary designs combining colour and texture.
Creating Durable Exposed Aggregate Patios and Floors
You can create inviting outdoor living spaces with exposed aggregate floors that balance aesthetic appeal and durability. Consider environmental exposure, foot traffic levels, and sealant types tailored to patio usage.
Design Considerations for Different Outdoor Environments
- Shaded areas: May require antifungal sealers to prevent moss growth.
- Sun-exposed zones: UV-resistant sealers extend finish longevity.
- Coastal environments: Use corrosion-resistant additives and aggressive curing due to salt exposure.
Comparing Costs and Value Based on Application Type
Costs vary by scale and environment; pathways generally cost less compared to driveways due to lower structural demands. Detailed budgets should factor in site prep, aggregate quality, and chemical treatments. To understand financial factors further, see our discussion on benefits of exposed aggregate concrete for driveways and outdoor spaces.
Now, let’s shift to enhancing workflow efficiency and ensuring quality control.
Pro Tips, Quality Control, and Workflow Optimization
Best Practices for Timing and Environmental Conditions
- Monitor ambient temperature and humidity with a site weather station to schedule pours and retarder application optimally.
- Avoid pours during rain forecasts; cover slabs promptly to protect fresh concrete.
- Adjust retarder dosage and exposure timing based on temperature—less time in hotter conditions, more in cold.
Quality Checks and Inspection Criteria During and After Laying
| Checkpoint | Acceptable Criteria | Action If Deviated |
|---|---|---|
| Concrete Slump | 75–100 mm | Adjust water or admixtures |
| Aggregate Spread Uniformity | Even distribution, no clumping | Remix batch or discard section |
| Retarder Coverage | Full, uniform application | Re-spray or delay exposure |
| Surface Exposure | Consistent aggregate reveal | Controlled additional brushing |
| Sealer Application | Even coats, no pooling | Roll out excess and reapply if needed |
Expert Troubleshooting for Common Problems on Site
- Spotty Aggregate Exposure: Clean affected areas with mild acid wash and rebrush carefully.
- Premature Setting: Use retarder additives or cool water mixing in hot weather.
- Over-application of Retarder: Leads to surface weakness; flush with water immediately and reapply sealer after curing.
Efficient Project Management for Exposed Aggregate Installations
Sequence tasks logically to avoid idle times. Define clear handover points between site prep, pouring, exposure, curing, and sealing. Schedule team roles and equipment use to eliminate bottlenecks. Document environmental conditions and responses to identify continuous improvement opportunities.
Before we conclude, let’s address key user questions and advanced troubleshooting tips.
FAQs and Advanced Troubleshooting for Exposed Aggregate Concrete
What to Do If Aggregate is Not Properly Exposed?
Reapply gentle washing and brushing within 24 hours, allowing concrete surface moisture to remain optimal. Avoid aggressive mechanical cleaning which destabilizes the slab. Consult retarder manufacturer tech sheets for re-application intervals.
How to Correct Surface Scaling or Dusting?
Scaling indicates poor curing. Apply a penetrating sealer after thorough cleaning and delay heavy traffic for additional curing days. For dusting, use a surface densifier to harden the top layer.
How Does Weather Affect the Laying Process?
High heat accelerates setting, requiring faster retarder application and exposure timing adjustment, while rain can dilute surface chemicals and wash away aggregates prematurely. Cold slows hydration, necessitating extended curing.
Cost-related Questions: Estimating Exposed Aggregate Concrete Price
Prices in Melbourne’s northern suburbs vary widely but range from AUD $80 to $150 per square meter depending on aggregate choice, site complexity, and finishing. Always factor in preparation and overhead costs.
Safety Best Practices During Installation
Use Safe Work Australia’s recommendations:
- Wear chemical-resistant gloves and goggles when handling retarders and sealers.
- Ensure adequate ventilation during curing and sealing phases.
- Train all workers on hazard communication and emergency procedures.
By applying these responses and precautions, you ensure success even under challenging conditions.
Conclusion: Achieving a professional and durable exposed aggregate surface hinges on meticulous preparation, exact timing of retarder and washing phases, expert finishing, and committed curing and sealing practices. Whether addressing an exposed concrete floor or installing a robust exposed aggregate pathway, this workflow equips you to tackle Melbourne’s northern suburb conditions confidently. For tailored colour combinations complementing your project, explore our guide on exposed aggregate colours from Hanson and Holcim palettes. Ready to transform your outdoor surfaces with expert precision? Begin your project plan today and trust this workflow as your definitive operational manual.
Frequently Asked Questions
What factors influence the choice between pebbles, gravel, and crushed stone for exposed aggregate?
Pebbles offer a smooth, polished look suitable for aesthetic appeal; gravel provides a rustic texture ideal for casual pathways, while crushed stone creates a rough surface for high traction. The choice depends on desired durability, slip resistance, and visual style for the project.
How does exposed aggregate concrete compare to stamped concrete in terms of durability?
Exposed aggregate concrete generally offers superior durability and slip resistance because of the textured surface, whereas stamped concrete, while decorative, can be more prone to surface damage and requires more frequent sealing to maintain integrity.
Which safety precautions are essential when working with chemical retarders?
Key safety measures include wearing chemical-resistant gloves, goggles, and respirators, ensuring proper ventilation, and following manufacturer guidelines. Proper training on handling and emergency protocols is also critical to prevent chemical exposure hazards on site.
When is the best time to apply curing compounds after pouring exposed aggregate concrete?
Curing compounds should be applied within 12–24 hours after washing away the cement paste, once the surface begins to firm up but still retains moisture. This timing optimizes hydration and strengthens the concrete’s long-term durability.
Can exposed aggregate concrete be used in high-traffic commercial areas?
Yes, exposed aggregate concrete is suitable for high-traffic commercial applications when paired with durable aggregates and structural-grade mixes. Its slip-resistant surface and robust finish provide longevity and safety in demanding environments.
Why is consistent retarder application critical for exposed aggregate finishes?
Consistent retarder application ensures even cement paste setting delays, preventing patchy or uneven aggregate exposure. Uniform chemical coverage directly impacts the final surface appearance and slip resistance.
How do the costs of exposed aggregate pathways compare to driveways?
Exposed aggregate pathways usually cost less due to simpler base requirements and lower structural demands, while driveways require thicker slabs and higher-grade materials, increasing installation complexity and price.
What defines exposed aggregate concrete in contrast to other decorative concrete finishes?
Exposed aggregate concrete is defined by revealing the top-layer aggregates embedded in the cement, creating a textured, slip-resistant surface unlike smooth or stamped finishes that imprint patterns onto the concrete surface.