
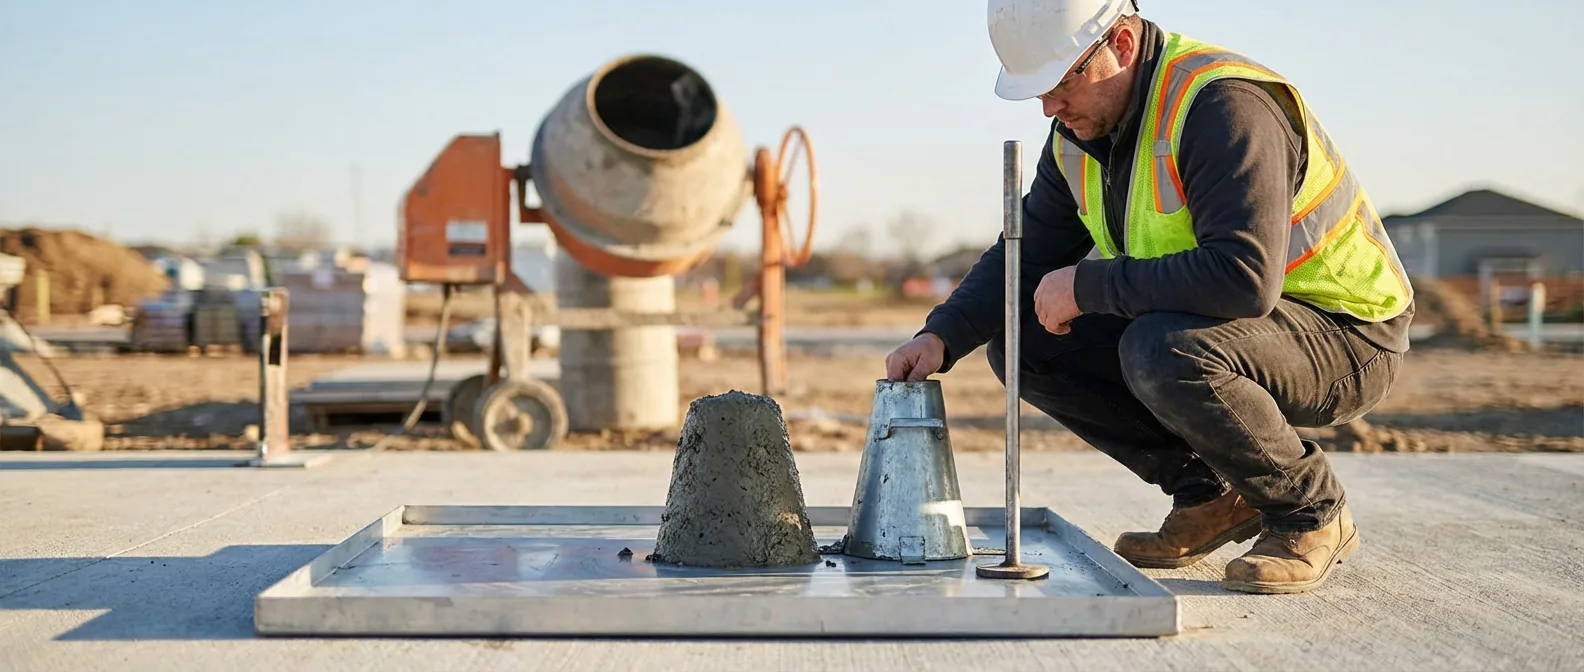
Concrete slump testing is a simple yet essential method to assess the workability and consistency of fresh concrete onsite. Accurate slump tests assure that concrete mixes meet required specifications for strength, handling, and durability, especially in demanding environments like Melbourne’s northern suburbs. This comprehensive guide covers everything from the core meaning of concrete slump to in-depth, step-by-step instructions on conducting the slump test, followed by ideal slump values and practical advice to ensure quality control and reliable construction outcomes.
Introduction to Concrete Slump and Its Importance
Defining Concrete Slump and Concrete Slump Meaning
The concrete slump refers to the vertical settlement or deformation of a fresh concrete sample when a standardized cone-shaped mould, known as the Abrams cone or slump cone, is removed. It measures the fresh concrete consistency and flow—essentially providing a snapshot of how workable or fluid the concrete mix is before it sets.
Concrete slump meaning lies in evaluating the ability of concrete to be placed and compacted without segregation or excessive bleeding. A higher slump indicates wetter, more fluid concrete, while a low slump suggests stiffer, drier concrete.
Understanding the differences between cement and concrete helps clarify why slump testing is vital for concrete specifically, not cement alone.
Purpose and Significance of the Slump Test in Construction Quality Control
The slump test serves as a quick, reliable indicator of fresh concrete workability, used extensively as a quality control tool onsite. Since concrete must be workable enough to fill forms and encapsulate reinforcement without voids, slump values help engineers and site managers monitor mix uniformity and adjust water content as needed.
Performing the slump test regularly ensures compliance with project specifications and helps prevent construction defects due to poor concrete consistency. Particularly, in the variable climatic conditions of Melbourne’s northern suburbs, slump testing supports consistent performance across different seasons and project phases.
Basic Terminology: Slump Value, Concrete Consistency, Fresh Concrete
- Slump value: The measured vertical difference (in millimeters) between the height of the fully filled slump cone and the settled concrete surface after cone removal.
- Concrete consistency: Refers to the ease with which concrete flows, closely linked to its slump.
- Fresh concrete: Concrete in a plastic state before initial set, where slump testing is applicable.
Understanding these terms is foundational before exploring equipment and methodology.
Equipment Used in the Slump Test
Abrams Cone (Slump Cone) Description and Specifications
The Abrams cone, or slump cone, is a truncated metal cone standardized for testing concrete workability. It is typically made of steel or aluminum and must adhere to precise dimensions:
| Dimension | Size |
|---|---|
| Height | 300 mm |
| Bottom diameter | 200 mm |
| Top diameter | 100 mm |
These dimensions comply with international standards such as ASTM C143, ensuring consistency and comparability across tests.
Slump Cone for Concrete: Materials and Dimensions
Besides metal cones, the slump cone for concrete must be sturdy, non-porous, and free from damage to prevent interference with results. Its weight and finish help maintain placement stability during the test.
The cone’s smooth interior surfaces facilitate clean removal without disturbing the concrete sample. Maintaining these conditions on-site guarantees accuracy in the slump cone test of concrete.
Additional Equipment: Base Plate, Tamping Rod, Measuring Scale
- Base plate: A flat, rigid surface (often steel or wood) used as a base to position the cone for filling.
- Tamping rod: A standard 16 mm diameter steel rod, 600 mm long, rounded at one end, used to compact concrete in the cone.
- Measuring scale or ruler: To accurately measure the slump value after cone removal.
Step-by-Step Procedure of the Slump Cone Test
Preparation Before the Test: Sample Collection and Equipment Setup
Before beginning the test, collect a representative fresh concrete sample ideally within 5 to 10 minutes of batching. Use clean equipment, and ensure the testing surface is rigid and level.
Secure the Abrams cone on the base plate firmly to prevent movement during filling.
Filling the Slump Cone: Layering and Rod Tamping Process
- Fill the slump cone in three approximately equal layers.
- Compact each layer by tamping 25 times uniformly with the tamping rod. Insert the rod vertically and strike the layer’s surface evenly; avoid stirring or dragging the rod.
- Ensure the final layer overflows slightly above the cone rim to compensate for settlement during tamping.
- Strike off excess concrete level with the top of the cone for a smooth finish.
Lifting the Abrams Cone: Measuring the Concrete Slump Value
- Carefully and vertically lift the Abrams cone upwards in about 5 to 10 seconds without lateral or twisting motion to prevent disturbance.
- Place the cone next to the settled concrete and immediately measure the distance between the top of the cone and the displaced concrete apex.
- The measured vertical difference is the slump value of concrete, recorded in millimeters.
Ensure quick and precise measurement to avoid concrete moisture changes.
Common Mistakes and How to Avoid Them
- Lifting the cone too fast or at an angle — leads to inaccurate slump.
- Under- or over-tamping the layers — affects compaction and inconsistency.
- Using a dirty or damaged cone — alters concrete flow and measurement.
- Incorrect sample timing or environmental influence not accounted for.
Proper training and adherence to ASTM C143 or relevant standards prevent these pitfalls.
Interpretation and Significance of Slump Values
What Does the Slump Value of Concrete Indicate?
The slump value quantifies the workability and fluidity of the concrete mix. It is directly correlated with the water-cement ratio, aggregate characteristics, and cement content, all crucial determinants of fresh concrete behaviour.
A moderate slump reflects balanced workability suitable for most applications, whereas extreme high or low slump values can indicate problems such as segregation or insufficient cohesion. Ideal slump values vary depending on the concrete’s strength class; for mixing 25–32 MPa concrete in Australia, precise ratios significantly affect consistency and workability — see concrete mix ratios for 25–32 MPa concrete strength.
Ideal Slump Values for Different Concrete Applications
| Application | Recommended Slump Range (mm) |
|---|---|
| Mass concrete (foundations, large structures) | 25–75 |
| General construction (slabs, beams, columns) | 75–100 |
| Pavements and floors | 50–100 |
| Precast concrete | 50–100 |
| High workability (pumping or complicated formwork) | 100–180 |
Adhering to these benchmarks ensures proper placement and compaction without compromising concrete integrity.
The slump values provide practical benchmarks for assessing concrete mix ratios and their impact on strength, as detailed in our comprehensive concrete mix ratios and strength guide.
Influence of Water-Cement Ratio on the Slump Value
The water-cement ratio is a principal factor impacting slump and overall concrete quality. Increasing water content raises slump, improving workability but potentially reducing strength and durability.
Conversely, too little water lowers slump, resulting in stiff mixes that may cause placement difficulties or cold joints.
Maintaining an optimal ratio controls not just slump but long-term performance, underscoring the importance of precise slump testing.
Troubleshooting High and Low Slump Readings
- High slump (>180 mm): Indicates too wet mix; risks segregation and bleeding. Remedy by reducing water or admixtures.
- Low slump (<25 mm): Indicates dry, stiff concrete; challenges in placement and compaction. Remedy by slightly increasing water or using admixtures.
- Consistent variation may signal batching errors, improper aggregate grading, or contamination.
Standards and Codes Governing the Slump Test
Overview of ASTM C143 and Other Relevant Standards
The slump test procedure is standardized internationally under ASTM C143/C143M — Standard Test Method for Slump of Hydraulic-Cement Concrete. This document specifies equipment dimensions, test steps, and reporting formats to ensure reliable, repeatable results.
In Australia, Standards Australia adopts related guidelines embodied in AS 1012.3.1 and AS 1379, aligning with international norms but tailored for local conditions.
Compliance Requirements for Accurate Slump Testing
- Use calibrated and maintained equipment as per ASTM or AS specifications.
- Conduct test within stipulated time after batching to avoid variability.
- Ensure consistent sampling and procedural fidelity to avoid human error.
- Record slump values accurately and report alongside mix parameters.
How Standards Affect Slump Test Procedures and Reporting
These codes dictate not only how the test must be performed but also how results are interpreted and utilized for project quality control. Adhering to standards contributes to engineering confidence and regulatory compliance across Melbourne’s construction industry.
Practical Tips and Best Practices for Conducting the Slump Cone Test
Environmental Conditions and Their Impact on Test Results
Weather conditions, such as temperature and humidity prevalent in Melbourne’s northern suburbs, can influence slump results. Hot, dry weather may accelerate water evaporation, lowering slump values if testing is delayed. Conversely, high humidity preserves moisture longer.
To counteract these variations:
- Conduct tests promptly after sampling.
- Use shadowed or sheltered areas for testing.
- Adjust water content or admixtures considering ambient conditions.
Incorporating slump testing within the best practices in concrete mix design and finishing enhances final product quality, including specialised coloured concrete mixes.
Handling Variations in Concrete Mix Types During Testing
Different mixes, including rapid-setting concretes or those with varied aggregate sizes, require attention. For rapid-setting types, perform slump tests swiftly to capture early workability, or use admixtures designed for extended workability windows.
Larger aggregate sizes can affect tamping effectiveness; ensure proper rod technique and layer compaction. If aggregate heterogeneity is significant, increase sampling frequency to maintain testing accuracy.
Quality Control Protocols Involving Slump Testing On-Site
- Establish routine slump testing schedules based on project milestones and batch deliveries.
- Train personnel thoroughly on the procedure of slump cone test and common errors.
- Record, analyse, and act on slump data systematically to identify trends or deviations early.
- Complement slump tests with other onsite tests such as air content and temperature measurement for holistic quality control.
Use Cases and Applications of Slump Testing in Construction
Slump Testing for Outdoor Construction Projects
Outdoor projects, including pavements, footpaths, and foundations in Melbourne’s northern suburbs, expose concrete to environmental stressors. Regular slump testing ensures the concrete mix delivered onsite maintains the expected workability, vital for effective placement and weather resistance.
Role of Slump Test in Ready-Mix Concrete Quality Control
Ready-mix concrete suppliers rely on slump tests for batch-to-batch consistency verification. A stable slump value close to the design target confirms the mix meets specifications before dispatch. Adjustments are made proactively when deviations appear.
Additionally, slump tests help evaluate the quality and workability differences between fibre and steel reinforced concretes, crucial for tailored reinforcement strategies. For more on this topic, explore our article on comparison of fibre and steel reinforced concrete.
When selecting a coloured concrete driveway, understanding the workability and slump test results ensures optimal mix performance on site, especially within Melbourne’s unique climate conditions. For detailed options, see our guide on coloured concrete driveway options in Melbourne.
When to Perform Slump Tests During the Concrete Pouring Process
Standard practice is to perform slump tests immediately after batching and before concrete pouring. For longer pours or where delays occur, additional tests may be necessary to confirm constant workability, enabling remedial action if slump drifts beyond acceptable tolerances.
Frequently Asked Questions (FAQs) and Troubleshooting Guide
Common Reader Questions About the Slump Test Procedure
- Q: Why is the slump test important?
- A: It provides a quick, reliable measure of concrete workability critical for proper placement and strength development.
- Q: How soon after mixing should the slump test be performed?
- A: Ideally within 5 to 10 minutes to capture fresh concrete consistency before setting begins.
- Q: Can slump tests be performed on all concrete types?
- A: Slump tests work best for conventional mixes; rapid-setting or very dry/highly fluid mixes may require adjustments or alternative tests.
Addressing Common Issues Encountered During Testing
- Inconsistent slump results: Often due to sample variation, improper tamping, or environmental changes. Ensure uniform sampling and consistent technique.
- Lifting cone too quickly: May cause exaggerated slump readings; lift smoothly and vertically.
- High slump causing segregation: Adjust mix design to reduce water content or use stabilising admixtures.
Tips for Ensuring Consistent and Reliable Results
- Use properly calibrated equipment per ASTM C143 and maintain routine checks.
- Train operators with hands-on sessions to reinforce correct rod tamping and cone lifting technique.
- Test multiple samples at each interval to average out anomalies.
- Document environmental conditions during testing to explain possible deviations.
If slump values are repeatedly outside acceptable ranges onsite, consult mix design experts or batching plant supervisors promptly to review water-cement ratios, aggregate grading, and admixture usage. Early intervention can prevent costly rework or compromised structural integrity.
For detailed troubleshooting, official procedural clarifications, and standards references, visit ASTM International and the Concrete Institute of Australia.
Summary: The slump test is a fundamental and practical tool that offers immediate insights into concrete mix workability essential for quality concrete construction in Melbourne’s northern suburbs. By meticulously following the procedure of slump cone test, understanding the implications of slump values, and aligning testing with standards such as ASTM C143, contractors can ensure their concrete meets performance expectations reliably. Adapting slump testing to local environmental conditions and project-specific requirements further elevates construction quality and longevity.
To master the slump test for your next concrete project or refine your onsite quality control protocols, begin applying these detailed guidelines today and maintain your concrete workability confidently with each pour.
Frequently Asked Questions
What is the difference between the slump test and the flow test in concrete workability?
The slump test measures concrete workability by the vertical settlement of a fresh sample, while the flow test assesses the spread and flow diameter of concrete on a flat surface. Slump tests are quicker and simpler, suitable for most mixes; flow tests better evaluate highly fluid or self-compacting concretes.
How does the slump cone test differ from other concrete consistency tests?
The slump cone test uses a standardized cone and tamping to measure vertical settlement, providing a quick workability indicator. Other tests, like the Vebe or flow table, evaluate different flow or compaction characteristics, often for mixes unsuitable for slump testing, such as very stiff or highly fluid concretes.
What does a zero slump value indicate about fresh concrete?
A zero slump means the concrete retains its original shape with no settlement after cone removal, indicating very stiff, low-workability concrete. This mix may be difficult to place and compact, often used for mass concrete or structures requiring minimal deformation.
When is it necessary to repeat slump testing during a concrete pour?
Slump testing should be repeated during long pours or when delays occur to monitor changes in workability. This ensures consistent concrete performance and allows timely adjustments before placement, especially under changing environmental conditions.
Can slump test results be affected by aggregate size and grading?
Yes, larger or poorly graded aggregates can reduce compaction effectiveness during the slump test, potentially lowering slump values. Uniform, well-graded aggregates facilitate accurate tamping and consistent slump results.
Which slump values are ideal for pumped concrete compared to traditional placement?
Pumped concrete typically requires higher slump values (100–180 mm) for adequate flow through pipes, whereas traditional placement methods use lower slump ranges (50–100 mm) to maintain stability and avoid segregation.
How important is equipment cleanliness in the slump cone test?
Equipment cleanliness is vital; debris or hardened concrete residues on the slump cone or tamping rod can affect concrete compaction and surface finish, leading to inaccurate slump measurements and inconsistent test results.
Is the slump test applicable for rapid-setting concrete mixes?
Slump tests can be used on rapid-setting concretes but must be performed quickly after mixing to accurately capture workability before setting progresses. Alternative tests might be recommended if setting is extremely fast.